One of the biggest challenges in mobile testing is scalability. There are great services out there like SauceLabs and Xamarin Test Cloud but unless you have a solid QA budget, it’s hard to justify the cost.
Testing using emulators is a way to get quick feedback for your developers, but if you really care about quality, there is no substitute for testing on physical devices.
Though some setups can be tedious and high maintenance, Appium allows for easy and reliable connectivity to physical Android devices connected via USB. Combine a reliable test framework with the potential of Selenium Grid for scalability, and you can create a low-maintenance test setup that scales easily.
Install Dependencies
If you don’t have these already, you will need:
- node.js
- The Appium npm module (
npm install -g appium) - Java
Install Android SDK
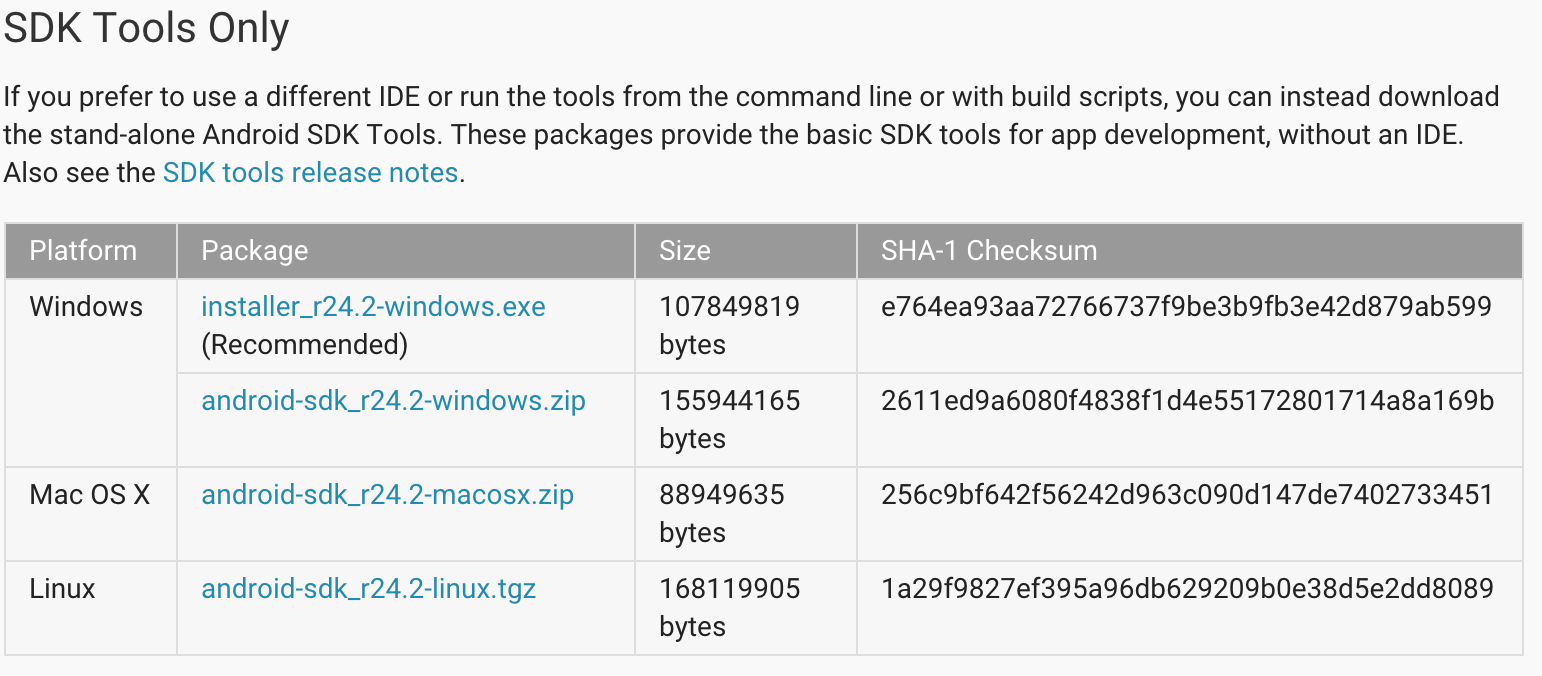
Skip this if you already have the Android SDK tools installed and added to your PATH, otherwise visit the Android SDK Download page and install the appropriate package from the bottom of the page. I prefer the standalone package for setting up CI pipelines, but if you plan to do Android development or create your own builds, install Android Studio.
Remember to export an $ANDROID_HOME environment variable! I recommend extracting the Android SDK to /usr/local, but you can put it wherever you please.
echo 'export ANDROID_HOME="/usr/local/android-sdk"' >> .bash_profile
echo 'export PATH=$PATH:$ANDROID_HOME/bin' >> .bash_profile
Set Android Devices to Developer Mode
Grab any devices that you want to use for test and follow the instructions to enable developer mode on each device.
To access these settings, open the Developer options in the system Settings. On Android 4.2 and higher, the Developer options screen is hidden by default. To make it visible, go to Settings > About phone and tap Build number seven times. Return to the previous screen to find Developer options at the bottom.
Plug in devices to the computer that you want to use as a test host and run adb devices to get list of connected devices. Make sure the status registers as device.
If your connected devices show unauthorized, you need to enable USB Debugging from the Developer options settings menu on the device.

Bind Appium to Devices
For Selenium Grid to properly delegate requests to each device node, individual Appium instances need to be bound to each device you have connected.
Appium makes it easy to connect to Selenium Grid with templated config files. The official documentation is here. Each device needs a configuration file that looks like this:
{
  "capabilities":
    [
      {
        "browserName": "Android",
        "version":"ENTER YOUR ANDROID OS VERSION HERE",
        "maxInstances": 1,
        "platform":"ANDROID",
        "deviceName":"ENTER YOUR UDID FROM `adb devices` HERE",
        "newCommandTimeout":"30",
        "deviceReadyTimeout":5
      }
    ],
  "configuration":
  {
    "cleanUpCycle":2000,
    "timeout":10800,
    "url":"http://127.0.0.1:4723/wd/hub",
    "host": "127.0.0.1",
    "port": 4723,
    "proxy": "org.openqa.grid.selenium.proxy.DefaultRemoteProxy",
    "maxSession": 1,
    "register": true,
    "registerCycle": 5000,
    "hubPort": 4444,
    "hubHost": "127.0.0.1"
  }
}
Replace the version attribute with the Android Version (e.g. 4.4) and the deviceName attribute with the UDID obtained from the output of adb devices.
The url port mapping and port number will need to be unique for each device as you connect additional devices. For example, the first device would look like the
configuration above, but the second device would have a url attribute of http://127.0.0.1:4725/wd/hub and a port attribute of 4725.
Remember to increment these as you add more devices, as these are the ports that each Appium server will listen for requests.
The only major differences from the Appium example config are in the newCommandTimeout and deviceReadyTimeout attributes. Setting these is important for reliability
to make sure that the devices drop unresponsive or aborted tests, and to make sure the device is ready for commands after registering as ready.
Install and Start Selenium Grid
Download Selenium standalone from SeleniumHQ and run in hub mode:
java -jar selenium-server-standalone-2.14.0.jar -role hub
Thats it for Selenium Hub! You should be able to visit http://localhost:4444/grid/console and see the hub console with no nodes attached.
Attach Appium Device Nodes
For each .json configuration file created earlier, run the following in different terminal tabs:
appium --nodeconfig /absolute/path/to/eachnodeconfig.json -p 4723 -cp 4723
The -p and -cp ports should correspond to the ports set in each .json file. At this point, you should see each node registered in the grid console and can begin
running your test suite.
Set Capabilities with Appium
Appium, by default, uses an appium.txt file written in TOML to configure capabilities for devices.
[caps]
appiumVersion = "1.3.7"
deviceName = "Android Emulator"
platformName = "Android"
platformVersion = "ANDROID OS VERSION"
app = "PATH TO APP"

[appium_lib]
server_url = "http://localhost:4444/wd/hub"
Make sure to fill in the platformVersion with the requested Android OS version, and the app property with the absolute path to the app under test.
If you are hosting the Selenium Hub server on a different machine, update the server_url property to reflect it’s location.
Let It Ride
At last, you should be fully prepared to execute test runs with your connected Android devices. Running tests in parallel is easy if you have multiple devices with the same listed capabilities.
If you use Ruby to write specs, the parallel_tests gem is your best bet.
But what about iOS?
Testing iOS devices can be done in a similar way, but only one iOS device can be connected to a host for testing, so the Selenium Grid approach does not make sense at this time. Services such as SauceLabs are offering cloud iOS testing in the near future, so that is your best bet.